NuPack - a quick walkthrough
NuPack is a free, open source, developer-focused package manager for .NET. It looks great, so I downloaded it and gave it a try. Let’s have a look at how to use it.
To get started with NuPack, just do the following:
- Visit the NuPack web site.
- Click the download button to download the latest release.
- Double click on the downloaded file to install NuPack.
- Open any .NET solution or create a new one.
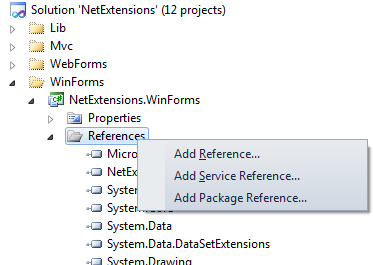
- Right-click “references”.
- Voilá! A new “Add Package Reference” context menu item exists!
Getting NuPack working was easy. After completing the steps above, you should see this:
Click “Add Package Reference” opens a modal where you can search for packages:
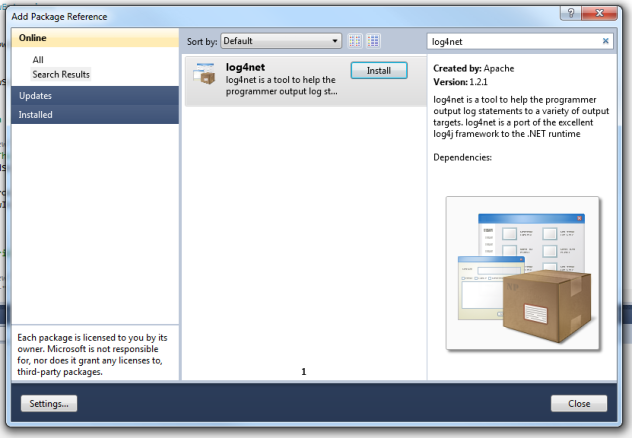
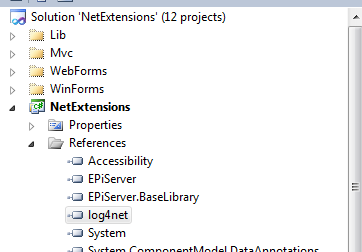
In the image above, I search for log4net, which is a nice logging tool for .NET. If I click the Install button, the package is downloaded and added to my project:
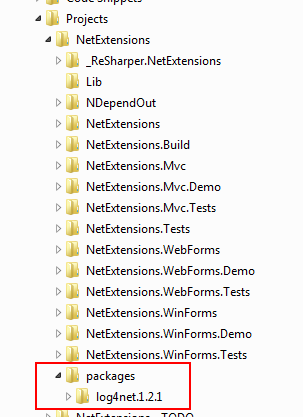
If we look in the solution folder structure, NuPack has created a “packages” folder, which contains the downloaded package:
If you need log4net in another project or solution, just repeat these steps. Simple, huh?
Something to note, is that I noticed that the added log4net reference points to the GAC:
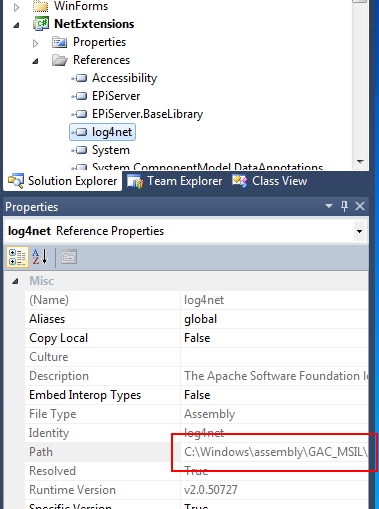
Since I’d rather have a reference to a physical .dll file, I just add the NuPack fetched .dll file to version control, then remove the package reference and refer to the .dll file.
Conclusion? NuPack rocks!
Discussions & More
Please share any ideas, feedback or comments you may have in the Disqus section below, or by replying on Twitter or Mastodon.
If you found this text interesting, make sure to follow me on Twitter and Mastodon for more content like this, and to be notified when new content is published.
If you like & want to support my work, please consider sponsoring me on GitHub Sponsors.