Compressing images and PDFs from the Finder context menu
Sep 15, 2026 ·
This article shows how to create two Finder Quick Actions that can compress images and PDFs with a single right-click on any file in Finder. Just right click and compress away.
Background
For years, my workflow for shrinking PDFs and images looked like this: open a browser and search for “compress pdf”, pick the site that looked least likely to sell my file to a data broker, upload, wait for the spinner, download the file and rename it to something sane, then delete the original. Then do it all again the next time, with the same dance for images.
Every single time, the same thought: there must be a better way. My Mac has a perfectly good CPU. Why am I sending all these files to an unknown server in an equally unknown country to have it do what my own laptop could do in two seconds?
Turns out that Finder and Automator can work together to handle this problem in a very nice way.
Say Hello to Automator
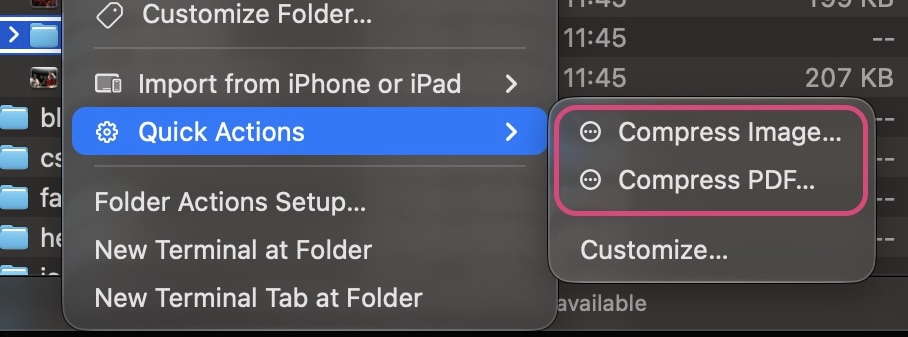
The solution was to build two Automator Quick Actions - “Compress Image” and “Compress PDF”. Once installed, they live in the Finder context menu, where they accept single files or entire folders, and compress them either in-place or into a new folder.
Both workflows are just a Run Shell Script action with the input passed as arguments, wrapped in a Quick Action that accepts files and folders from Finder. Let’s take a look at each workflow.
Compress Image
The compress image workflow handles JPEG, PNG, GIF, WebP, BMP, TIFF and HEIC. It does its best work with two Homebrew tools, pngquant and oxipng, and offers to install them on the first run.
The overall flow is:
- Collect every image from the selected files and folders.
- Check that the tools are installed and offer to
brew installthem if not. - Ask if images should be compressed “In Place” or “To Folder”.
- For each image, try the available compression methods in order.
- Show a notification with the result.
The image compression will try a bunch of methods from best to worst, and pick the first one that produces a smaller file. This is the important part: every candidate is checked against the original, and if it isn’t smaller it’s thrown away.
For PNGs, the order is pngquant (lossy but good), then oxipng (lossless), then optipng and pngcrush if you have them, and as a last resort sips downscales the image. That last step is destructive, but it only runs if every proper PNG tool is missing or has failed.
The script that Automator runs is a regular Shell script:
#!/bin/bash
#
# Compress Image — Finder Quick Action
#
# Compresses the selected images (or every image in the selected folders).
# A dialog asks whether to compress "In Place" (overwrite the originals)
# or "To Folder" (write copies into a "compressed" subfolder next to each file).
#
# Tools for much better PNG results (the script offers to install them via Homebrew):
#   brew install pngquant optipng oxipng pngcrush
# Without them the script falls back to the built-in `sips`.

COMPRESSED_FOLDER_NAME="compressed"
LOG_FILE="$HOME/Library/Logs/CompressImage.log"
SUPPORTED_EXT=("jpg" "jpeg" "png" "gif" "webp" "bmp" "tiff" "tif" "heic")

export PATH="/opt/homebrew/bin:/usr/local/bin:/usr/bin:/bin:$PATH"

# ---------------------------------------------------------------------------
# Helpers
# ---------------------------------------------------------------------------

log() { echo "$*" >> "$LOG_FILE"; }

notify() {
    /usr/bin/osascript -e "display notification \"$1\" with title \"Compress Image\""

...
I was considering posting the full script here, but I think it’s better if you just download the zip with the two Automator workflows if you want to take a look at it.
Compress PDF
The compress PDF workflow has the same shape, but a different set of tools. PDFs are harder, since a PDF can contain drastically different content, where each may need a different treatment.
The heavy lifting is done by Ghostscript, which is what most of the online services use. The script tries three presets in order, from most to least aggressive:
/screenwith images downsampled to 150 dpi and JPEG quality 60./ebookat 200 dpi and quality 75./printerat 300 dpi and quality 85.
As with images, each result is only kept if it’s actually smaller than the original. This matters more than you’d think, because Ghostscript will happily re-encode a well-optimised PDF into something 20% larger and report complete success. Text-heavy PDFs that are already well-compressed usually fall through all three presets and land on qpdf, which doesn’t touch the images but tightens up the file structure and stream compression.
If neither Ghostscript nor qpdf is installed, the last fallback uses macOS’s own Quartz “Reduce File Size” filter through PDFKit, driven by a small piece of JavaScript for Automation embedded in the shell script. It’s the same filter you get from Preview’s Export… dialog.
Quarz is surprisingly bad at text documents (it makes them bigger, which the size check catches) but does a reasonable job on scanned or photo-heavy PDFs, which is exactly the kind you’re usually trying to shrink. So even on a fresh Mac with nothing installed, the workflow does something useful.
Like the image script, it offers to install Ghostscript and qpdf via Homebrew on first run. Ghostscript is a quite large install and takes a minute or two, so the script posts a notification when it starts and another when it’s done, rather than leaving you wondering whether Finder has crashed.
The script that Automator runs is a regular Shell script:
#!/bin/bash
#
# Compress PDF — Finder Quick Action
#
# Compresses the selected PDFs (or every PDF in the selected folders).
# A dialog asks whether to compress "In Place" (overwrite the originals)
# or "To Folder" (write copies into a "compressed" subfolder next to each file).
#
# Strongly recommended (the script offers to install them via Homebrew):
#   brew install ghostscript qpdf
# Without them the script falls back to macOS' built-in Quartz
# "Reduce File Size" filter, which only helps for image-heavy PDFs.

COMPRESSED_FOLDER_NAME="compressed"
LOG_FILE="$HOME/Library/Logs/CompressPDF.log"
QUARTZ_FILTER="/System/Library/Filters/Reduce File Size.qfilter"

export PATH="/opt/homebrew/bin:/usr/local/bin:/usr/bin:/bin:$PATH"

# ---------------------------------------------------------------------------
# Helpers
# ---------------------------------------------------------------------------

log() { echo "$*" >> "$LOG_FILE"; }

notify() {
    /usr/bin/osascript -e "display notification \"$1\" with title \"Compress PDF\""
}

# Every temp file lives in its own private directory that is removed on exit,
# so two files with the same name (in different folders) can never collide.
TMP_DIR="$(mktemp -d "${TMPDIR:-/tmp}/compress-pdf.XXXXXX")"
trap 'rm -rf "$TMP_DIR"' EXIT

...
Just like with the image script, but I think it’s better if you just download the zip with the Automator workflows if you want to take a look at them.
Installing the workflows
Both workflows are standard Automator Quick Actions that can be installed to be added to Finder.
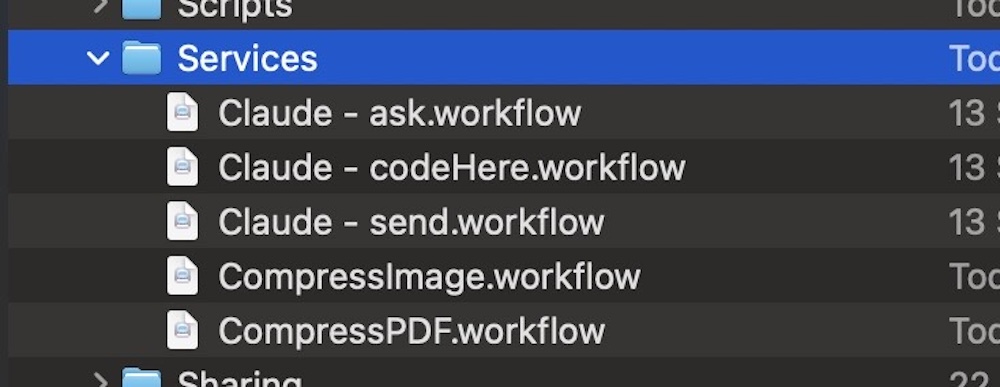
To install them, just download and unzip the zip file, then run each workflow. You will get a prompt if you want to install the workflows, which will move them to the install folder ~/Library/Services:
Once they’re installed, you can reach them from “Quick Actions” in Finder’s right-click context menu:
The first time you run a workflow, macOS may ask for permission to let it control System Events (for the dialog) and to send notifications. Say yes, or you’ll be staring at a menu item that does nothing, which is a very specific flavour of frustration.
Conclusion
These scripts aren’t clever. They’re just a list of tools, tried in order, with a size check between each step so nothing ever gets worse. Most of the value came from just putting it a right-click away.
I’ve now gone several months without visiting a “compress PDF online” website, and I don’t miss the spinners. Today it’s all “right-click, pick a mode, done”. A 7 MB scan becomes 1.8 MB, a 600 KB PNG becomes 290 KB with zero visual change, and the files never leave the machine.
Sometimes you don’t need a fancy website that steals your data, or a fancy app that charges you through the nose. Sometimes, all you have to do is just to download a workflow and right-click it.
Discussions & More
If you found this interesting, please share your thoughts on Bluesky and Mastodon. Make sure to follow to be notified when new content is published.