Building Closed-Source Binaries with GitHub Actions
Nov 9, 2025 ·
Using GitHub Actions is a great way to automate your build process. In this post, we’ll take a look at how GitHub Actions can build binaries (XCFramework and dSYMs) for a closed-source Swift package.
Why should we use a cloud service to build binaries?
Before we start looking at how to use GitHub Actions to build binaries, let’s discuss why you want to consider using a cloud service for this, instead of building them locally.
Cloud services like GitHub Actions let us decouple our build processes from our local environments, like a personal work computer. This reduces the risk of an OS update or machine problems to get in the way of a release, or for malware or viruses to get into the build.
While you can use any cloud service, like GitHub Actions or Xcode Cloud, the examples in this article are specific to GitHub Actions and its workflow format.
How to set up a closed-source Swift package
Setting up a closed-source Swift package involves a few steps. The details are beyond the scope of this post, but you can watch my talk from iOSKonf 25 for more information.
Basically, you’ll have a public distribution repository and a private source code repository. I also use separate repositories for build binaries and for the online documentation.
When releasing a new version of a closed-source package, the private source code is compiled to an XCFramework. You can also generate dSYMs for each release for symbolicated crash logs.
Let’s take a look at how we can use a GitHub Actions workflow to build the XCFramework & dSYMs.
Step 1 - Generating code signing certificates
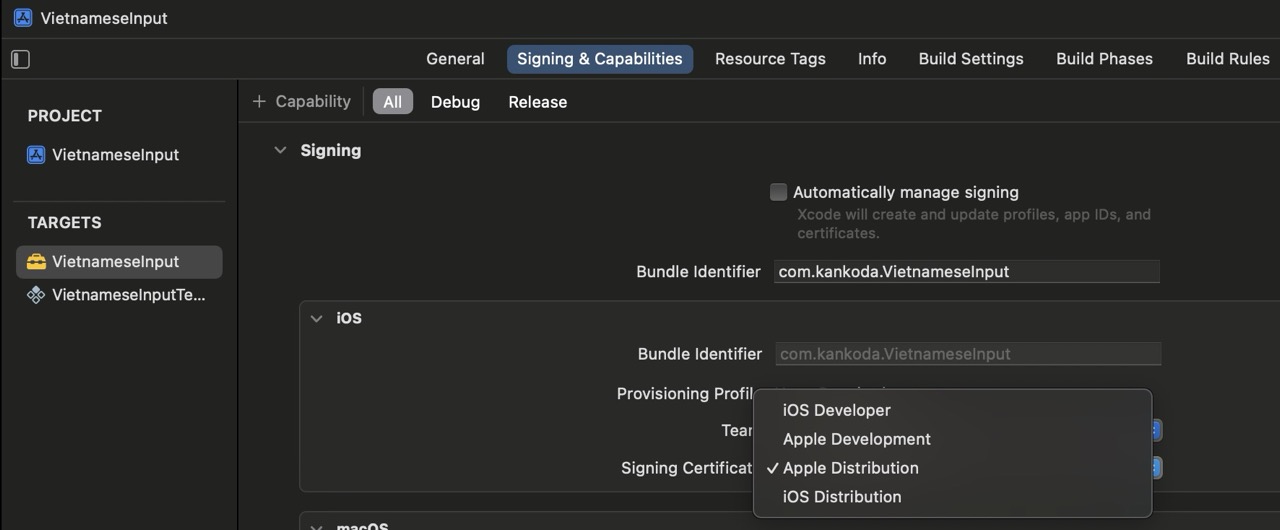
You first have to configure your closed-source Xcode project to use manual code signing instead of automatic, to make it possible for GitHub Actions to create a code signed archive.
To do this, toggle off “Automatically manage signing” and pick “Apple Distribution” for all platforms:
If your project supports multiple platforms, you must set a distribution certificate for each platform:
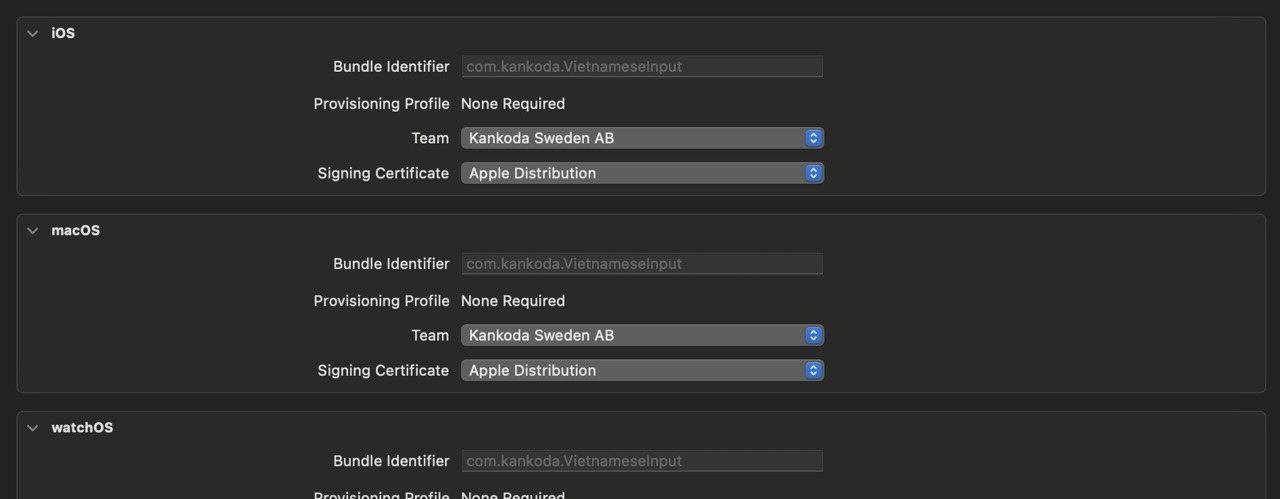
When you do this for the first time, Xcode will open the certificate generator and guide you through all the steps. Make sure that you generate a distribution certificate.
Once your certificate is generated, you can right-click the certificate file and export it as a .p12 file:
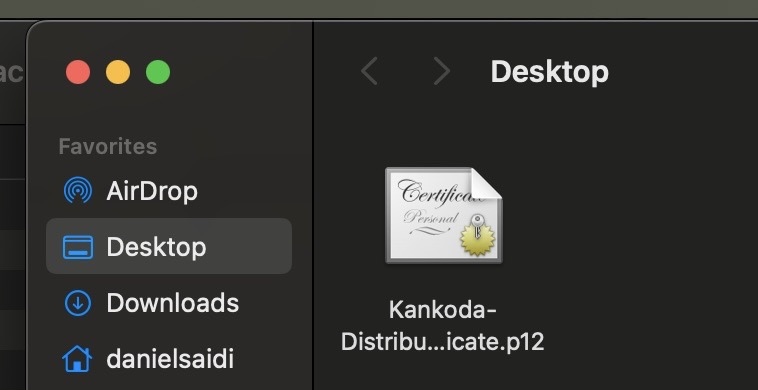
If you enter a password when exporting the certificate, it’s important that you remember it for later.
Step 2 - Setting up GitHub repository secrets
This article describes how to set up the repository secrets that are required to build the distribution binaries. We just need the Base64 .p12 file content, the .p12 file secret, and a keychain password:
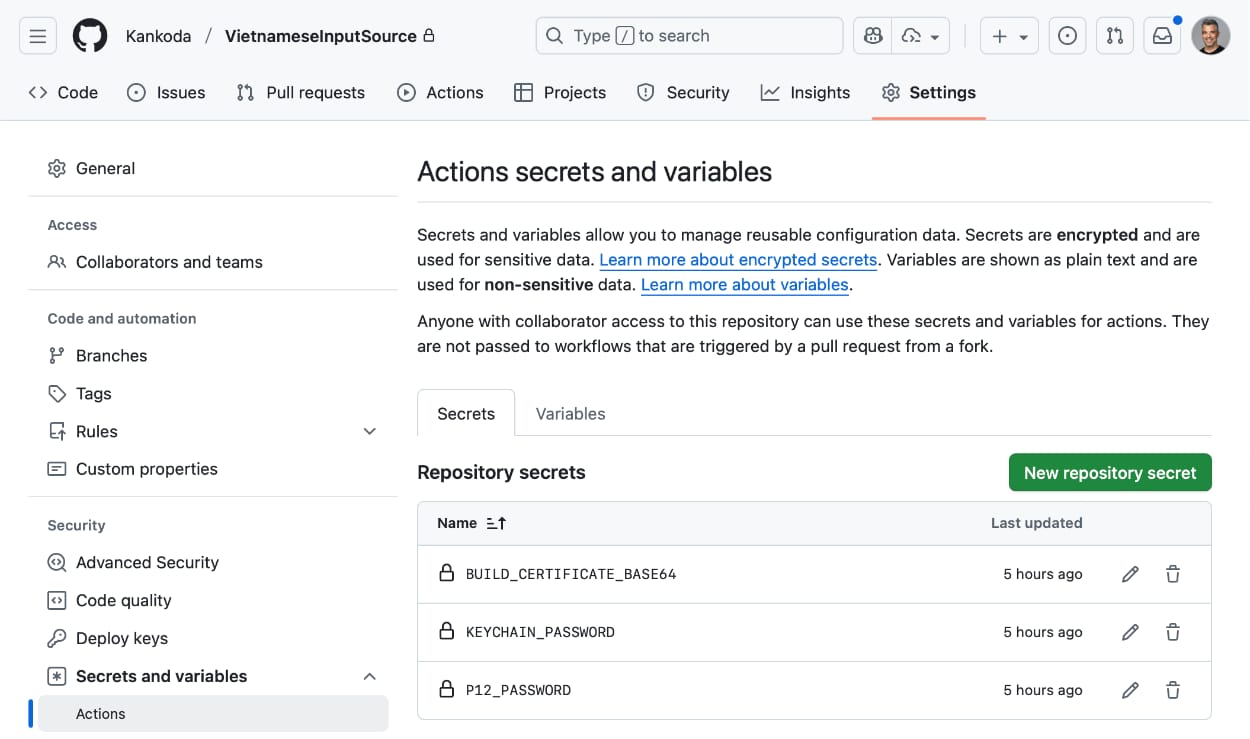
The secrets will be used to allow GitHub Actions to archive the source-code with valid code signing.
Step 3 - Setting up workflows and build scripts
Even though GitHub Actions makes things easy, you still need build scripts. The SwiftPackageScripts project has various scripts and GitHub Actions workflows for Swift packages.
The binary_artifacts GitHub Actions workflow can be used to automatically build XCFramework and dSYMs artifacts for any Swift package, then upload them to the action runner.
Step 4 - Setting up the GitHub Actions workflow
To be able to use GitHub Actions to build binary artifacts for a Swift package, first copy the .github and scripts folders from SwiftPackageScripts to the package root.
We’ll use the binary_artifacts.yml workflow, which calls various scripts. Let’s go through how this workflow is structured, to better understand it.
We start by giving it a name and adding inputs for bumping the build number after successful run:
name: Create Binary Artifacts

on:
  workflow_dispatch:
    inputs:
      bump_type:
        description: 'Version bump'
        required: false
        type: choice
        options:
          - none
          - patch
          - minor
          - major
          - custom
        default: none
      custom_version:
        description: 'Custom version (for "custom")'
        required: false
        type: string
The workflow will not bump the version by default, but this configuration lets us do so if we want to.
We must also request write permissions to be able to write to the repository, e.g. to bump versions:
permissions:
  contents: write
We then specify which machine to use. When this was written, macos-latest missed some runtimes, which is why we use macos-15. When you read this macos-latest should work fine.
jobs:
  build:
    runs-on: macos-15 # macos-latest
We can then add a build step that checks out the code, then another to use the package_name script to get the main package name and save it as an environment variable:
    steps:
      - name: Check out code
        uses: actions/checkout@v4

      - name: Get Package Name
        run: |
          PACKAGE_NAME=$(./scripts/package_name.sh)
          echo "PACKAGE_NAME=$PACKAGE_NAME" >> $GITHUB_ENV
We can then add a build step that decrypts the distribution certificate and adds it to the keychain:
      - name: Set up certificate
        env:
          BUILD_CERTIFICATE_BASE64: ${{ secrets.BUILD_CERTIFICATE_BASE64 }}
          P12_PASSWORD: ${{ secrets.P12_PASSWORD }}
          KEYCHAIN_PASSWORD: ${{ secrets.KEYCHAIN_PASSWORD }}
        run: |
          # create variables
          CERTIFICATE_PATH=$RUNNER_TEMP/build_certificate.p12
          KEYCHAIN_PATH=$RUNNER_TEMP/app-signing.keychain-db

          # import certificate from secrets
          echo -n "$BUILD_CERTIFICATE_BASE64" | base64 --decode -o $CERTIFICATE_PATH

          # create temporary keychain
          security create-keychain -p "$KEYCHAIN_PASSWORD" $KEYCHAIN_PATH
          security set-keychain-settings -lut 21600 $KEYCHAIN_PATH
          security unlock-keychain -p "$KEYCHAIN_PASSWORD" $KEYCHAIN_PATH

          # import certificate to keychain
          security import $CERTIFICATE_PATH -P "$P12_PASSWORD" -A -t cert -f pkcs12 -k $KEYCHAIN_PATH
          security set-key-partition-list -S apple-tool:,apple: -k "$KEYCHAIN_PASSWORD" $KEYCHAIN_PATH
          security list-keychain -d user -s $KEYCHAIN_PATH
With the distribution certificate added to the keychain, we can now create the XCFramework binary.
Let’s start by setting up Xcode. Öike with macOS, we had to define 16.4 since latest-stable didn’t work. When you read this, latest-stable should work fine:
      - name: Set up Xcode
        uses: maxim-lobanov/setup-xcode@v1
        with:
          xcode-version: 16.4 # latest-stable doesn't currently work
We can now call validate_release.sh to ensure that we’re on the main branch, that the code builds, and that all unit tests pass. We also disable SwiftLint, since it’s not available as a command line tool:
      - name: Validate Project
        run: ./scripts/validate_release.sh --platform iOS --swiftlint 0
We can then call framework.sh to generate the XCFramework binaries. We can pass in -p/--platform iOS to only build for iOS (up to you), -dsyms 1 to generate dSYMS and --zip 0 to skip the zip steps:
      - name: Generate distribution binaries
        run: ./scripts/framework.sh -p iOS --dsyms 1 --zip 1
When it comes to uploading the generated XCFramework as an artifact, do not ask GitHub Actions to upload the .xcframework directly. This would cause it to miss a root folder and many symbolic links.
Instead, we use --zip 1 above to generate a zip file, then upload the zip file as an artifact. Since it will be zipped again by GitHub Actions, we give the artifact a -Container suffix to clarify this:
      - name: Upload XCFramework Container
        uses: actions/upload-artifact@v4
        with:
          name: $-Container
          path: .build/$.zip
          if-no-files-found: error
This will require us to download and unzip the artifact before uploading it to a release, since the zip file will contain the XCFramework zip file.
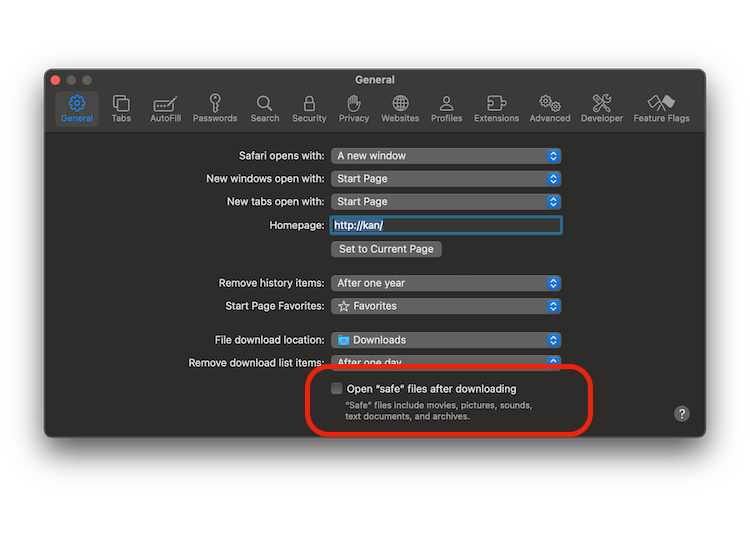
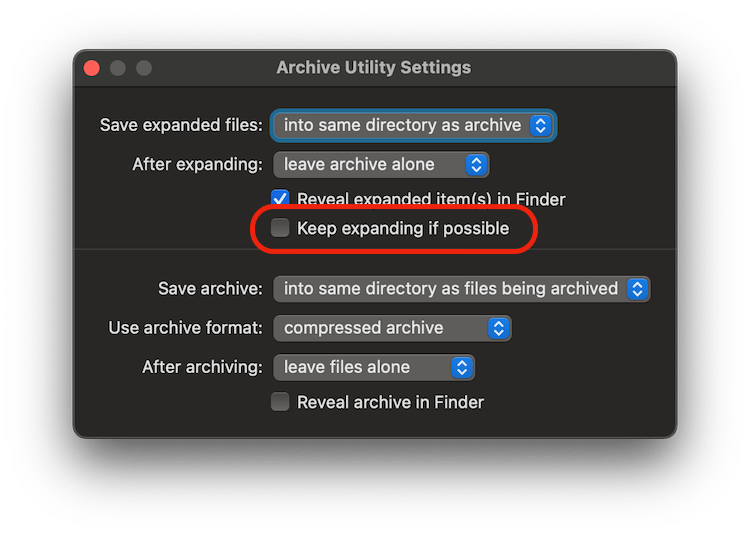
To simplify handling nested zip files, make sure to untick these boxes in Safari and Archive Utility:
We can finally upload the dSYMs symbolic files as an additional binary artifact with this build step:
      - name: Upload dSYMs
        uses: actions/upload-artifact@v4
        with:
          name: $-dSYMs
          path: .build/dSYMs
          if-no-files-found: error
If the user chooses to bump the package version after this build, we can handle it with these steps:
      - name: Configure Git
        if: $
        run: |
          git config user.name "github-actions[bot]"
          git config user.email "github-actions[bot]@users.noreply.github.com"

      - name: Bump Version
        if: $
        run: |
          if [ "$" = "custom" ]; then
            if [ -z "$" ]; then
              echo "Error: Custom version not provided"
              exit 1
            fi
            ./scripts/version_bump.sh --version "$"
          else
            ./scripts/version_bump.sh --type "$"
          fi
That’s it! We are finally ready to push this workflow file to GitHub and try it out to see that it works.
Step 5 - Running the GitHub Actions workflow
We can now push the workflow to GitHub and run it from the Actions tab. The workflow was set up with a manual trigger, but you can use on: to define automated triggers.
When the workflow finishes, it outputs the XCFramework and dSYMs zip files with their checksums:
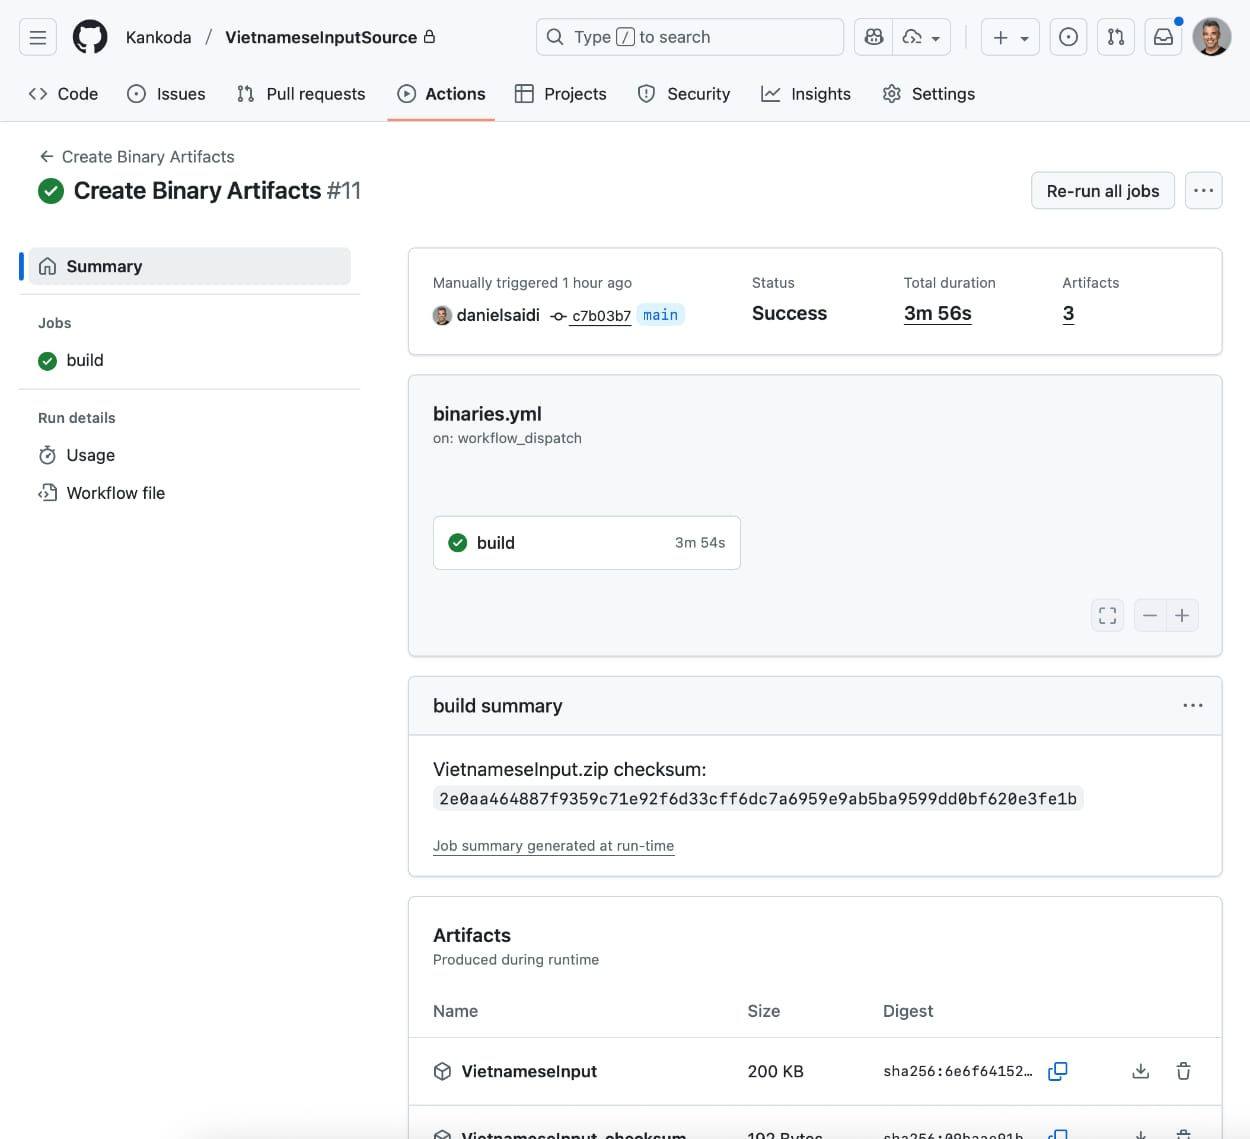
You can download the zip files and upload them somewhere public, then use them to create a new version of your SDK. Your users can download the dSYMs to get symbolicated crash logs.
Conclusion
GitHub Actions lets you automate the binary distribution file build process for a closed-source Swift package, and SwiftPackageScripts has a workflows and scripts to get up and running in no time.
I personally find the GitHub Actions workflow format a bit confusing, so I hope you find this helpful.
Discussions & More
If you found this interesting, please share your thoughts on Bluesky and Mastodon. Make sure to follow to be notified when new content is published.