Run Lint in Android Studio
Jul 31, 2013 ·
As I just started learning Android, I was happy to see that linting is such an integral part of the development process. Let’s see how to set it up in Android Studio.

For those who don’t know about linting, it’s a way to enforce code conventions. It’s a great tool, that’s however not as common in the iOS toolchain and Xcode has no built-in tools for it. Read more about linting here.
Android Studio comes with built-in support for linting. To analyze an Android project, simply select Analyze > Inspect Code. You can then set the scope of the analysis, such as which projects to analyze and which ones to skip.
For my test, I just chose to analyze everything and ended up with this nice summary:
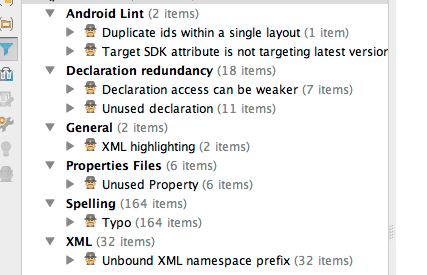
Browsing the report, you’ll notice that many warnings can just be ignored. For instance, the project name can be reported as a typo. The report will also add invalid XML to generated files, over which you have no control.
You can however specify which rules to ignore and add your own rules, which means that you can tailor this tool to your own needs. You can automate it to run during a build, when generating APKs etc. For a newbie like me, it provides a way to learn Android conventions.
If you’re new to linting, I really recommend checking it out. It’s a great tool that will make your code a lot more consistent, and can even help you find bugs.
Discussions & More
If you found this interesting, please share your thoughts on Bluesky and Mastodon. Make sure to follow to be notified when new content is published.